Datadog
Cypago + DataDog Integration
Leverage DataDog’s alerts and dashboards to enhance your security compliance automation with the Cypago Compliance Automation platform.
Below are the step-by-step instructions on how to connect DataDog to Cypago and manage this integration.
How it works
Cypago automatically collects monitoring dashboards, alert events, alert event configurations and incidents from DataDog. This collective data is then analyzed against security controls implemented by the user. These controls usually are part of a security standard, framework or regulation that the organization adheres to.
The analysis results in a context-rich status, indicating whether the collected data satisfies the security compliance requirements and if not, what are the exact gaps. Based on the automated compliance analysis done by the Cypago platform, the user enjoys an in-depth understanding of its security compliance posture.
Requirements
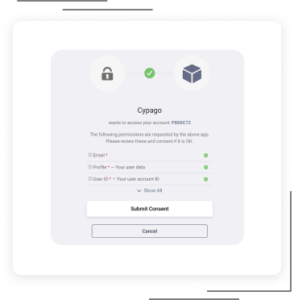
The DataDog integration requires only a “read scope” permission in order to collect the compliance-related evidence data.
Support
If you need any help getting the DataDog integration up and running, please do not hesitate to reach out to us via email at support@cypago.com.
Integration walkthrough
Connecting DataDog to Cypago
It is very easy and straightforward to integrate DataDog into the Cypago platform.
In DataDog:
You will need three pieces of information to be used in the Cypago integration screen (see below).
- In DataDog’s main screen, hover over your avatar in the lower left-hand corner and choose the “Organization Settings” option.
- From the upper right end of the page copy and save the organization name.
- In the “Organization Settings” page, select the “API Keys” section, and click on the “+ New Key” button.
- In the “New API Key” pop-up window, provide a meaningful name for the new key such as Cypago and click the “Create Key” button.
- Click “Copy” to copy the generated API key and save it.
- In the “Organization Settings” page, select the “Application Keys” section, and click on the “+ New Key” button.
- In the “New Key” pop-up window, provide a meaningful name for the new key such as Cypago and click the “Create Key” button.
- In the “New Key” window, click on “Edit” near the Scope section and select the following permissions in the “Edit Key Scope” window:
a. Incident_read (for incidents).
b. Dashboards_read (for dashboards).
c. Events_read (for alert events).
d. Monitors_read (for alert event configurations).
In Cypago:
- Login to your Cypago account and go to the Integrations tab.
- Click on Connect to start the integration process.
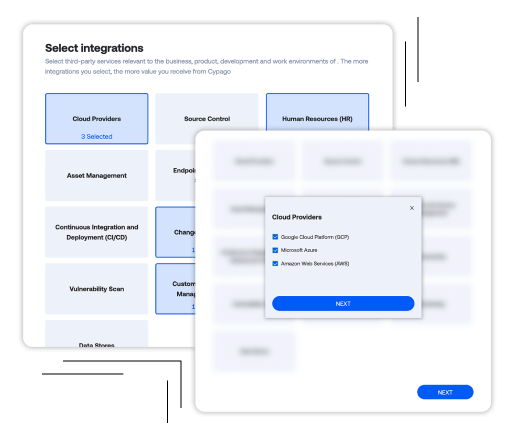
- In the “Select Integrations” side panel, click on the Monitoring group, and then check the box near the DataDog logo.
- Click Next, and then Next again at the bottom of the “Select Integrations” side panel.
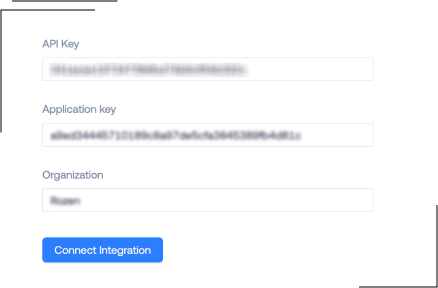
- In the “Connect Integrations” side panel, click on the DataDog logo, and provide the information obtained from DataDog - API Key, Application Key, Organization.
- Once all the fields are properly filled, click on “Connect Integration”.
- In few seconds a “Connected successfully” message will appear.
- Click on the Done button to complete the process.
- DataDog is now successfully connected to the Cypago platform and all relevant monitoring data will be automatically collected and analyzed.
How to disconnect DataDog from Cypago
In Cypago:
- In your Cypago account, go to the Integrations page, and scroll down to the DataDog integration section.
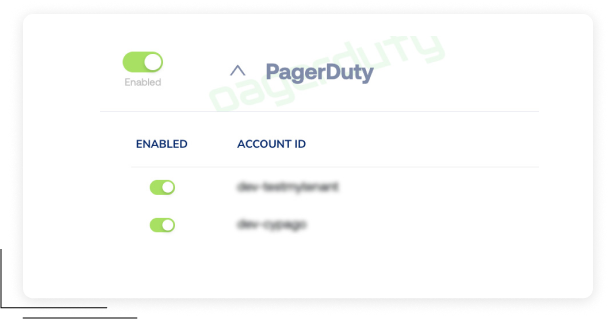
- From here there are two options for disconnecting: (i) disable the entire connection with DataDog, or (ii) disable a specific account in case you’ve connected more than one to the Cypago platform.
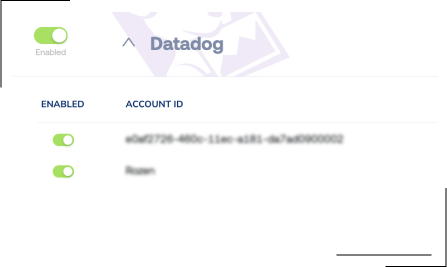
- In order to disable the entire connection, click on the Enabled switch to toggle the Disabled mode.
- If you want to disable only a specific account, click on the down arrow to open the detail view, and click on the Enabled switch near the account you would like to disable.
In DataDog:
- In DataDog’s main screen, hover over your avatar in the lower left-hand corner and choose the “Organization Settings” option.
- Delete the API Key created for the Cypago integration from the “API Keys” section.
- Delete the Application Key created for the Cypago integration from the “Application Keys” section.