One-Pager

Cyber GRC Automation Platform

One Platform To Visualize, Automate, And Manage GRC

The revolutionary Cypago Cyber GRC Automation (CGA) Platform combines the strength of SaaS architecture and advanced Correlation Engines, GenAI, and NLP based automation with an intuitive user experience, delivering complete coverage across all security frameworks and IT environments.

By reducing manual efforts, simplifying cross-functional workflows, and reducing costs, organizations can enhance their security and GRC maturity.

Revolutionizing Cyber GRC Across all Frameworks and Environments

icons

Fast
Onboarding

Turnkey SaaS architecture allows for easy implementation, adoption, and integrations with existing tools and services

icons

NextGen Automation
Technology

Advanced Correlation Engines, GenAI, and NLP capabilities that go beyond traditional automation

icons

Complete Coverage &
Customizable Workflows

Support for any security standard and framework across all environments, cloud-based and on-premises

icons

Security Program
Validation

No-code automation workflows, with 100’s of ready-made templates, for Continuous Control Monitoring and gap discovery

icons

Ease
of Use

Intuitive user experience and dashboards empower GRC Management, Security, and Ops teams to unify processes, streamline workflows, and demonstrate compliance

icons

Lower
TCO

SaaS delivery, out-off-the-box and customizable workflows, and centralized visibility and control reduces manual work and overhead

Trusted By

trusted-comp
trusted-comp
trusted-comp
trusted-comp
trusted-comp
trusted-comp
trusted-comp
trusted-comp
trusted-comp
trusted-comp

Testimonials

visual

Working with Cypago was one of the better decisions that we made early on. This saves us a lot of time, and for startups, time is everything.

Eitan Worcel

CEO & Co-Founder
visual

Before we had Cypago, the biggest challenge we had was that everything was through Excel spreadsheets. We had to put all the stuff into the Excel spreadsheet, clean it up, create SharePoint folders, create all these sessions with different stakeholders, explain to them what the process looked like, bring everything into these different places, and it's an extremely difficult, tedious process when it's done manually. [...] Now, we've reduced our workload by 30-35%. No more manual work, no more exporting spreadsheets and tickets - all that background noise and overhead is now gone.

Yonatan Kroll

Chief Information Security Officer

Accelerate Compliance with
any Cybersecurity Standard including

visual

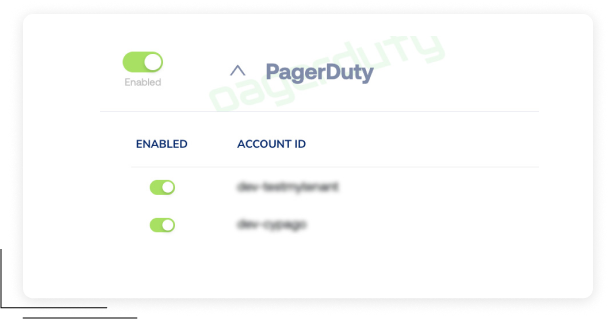
Seamlessly Integrate with Cross-functional
Tools and Services

1Password
1Password
Atlassian
Atlassian
AWS
AWS
Azure
Azure
Azure AD
Azure AD
Azure DevOps
Azure DevOps
Bamboohr
Bamboohr
Bitbucket
Bitbucket
Check Point CloudGuard
ClickUp
ClickUp
Cloudflare
Cloudflare
Coralogix
Coralogix
CrowdStrike
CrowdStrike
Curricula
Curricula
Datadog
Datadog

Cypago + DataDog Integration

Leverage DataDog’s alerts and dashboards to enhance your security compliance automation with the Cypago Compliance Automation platform. Below are the step-by-step instructions on how to connect DataDog to Cypago and manage this integration.

How it works

Cypago automatically collects monitoring dashboards, alert events, alert event configurations and incidents from DataDog. This collective data is then analyzed against security controls implemented by the user. These controls usually are part of a security standard, framework or regulation that the organization adheres to. The analysis results in a context-rich status, indicating whether the collected data satisfies the security compliance requirements and if not, what are the exact gaps. Based on the automated compliance analysis done by the Cypago platform, the user enjoys an in-depth understanding of its security compliance posture.

Requirements

The DataDog integration requires only a “read scope” permission in order to collect the compliance-related evidence data.

Support

If you need any help getting the DataDog integration up and running, please do not hesitate to reach out to us via email at support@cypago.com.  

Integration walkthrough

Connecting DataDog to Cypago It is very easy and straightforward to integrate DataDog into the Cypago platform. In DataDog: You will need three pieces of information to be used in the Cypago integration screen (see below).
  • Organization Name - 
  1. In DataDog’s main screen, hover over your avatar in the lower left-hand corner and choose the “Organization Settings” option.
  2. From the upper right end of the page copy and save the organization name.
  • API Key -
  1. In the “Organization Settings” page, select the “API Keys” section, and click on the “+ New Key” button.
  2. In the “New API Key” pop-up window, provide a meaningful name for the new key such as Cypago and click the “Create Key” button.
  3. Click “Copy” to copy the generated API key and save it.
  • Application Key -
  1. In the “Organization Settings” page, select the “Application Keys” section, and click on the “+ New Key” button.
  2. In the “New Key” pop-up window, provide a meaningful name for the new key such as Cypago and click the “Create Key” button.
  3. In the “New Key” window, click on “Edit” near the Scope section and select the following permissions in the “Edit Key Scope” window: a. Incident_read (for incidents). b. Dashboards_read (for dashboards). c. Events_read (for alert events). d. Monitors_read (for alert event configurations).
In Cypago:
  1. Login to your Cypago account and go to the Integrations tab.
  2. Click on Connect to start the integration process.
  3. In the “Select Integrations” side panel, click on the Monitoring group, and then check the box near the DataDog logo.
  4. Click Next, and then Next again at the bottom of the “Select Integrations” side panel.
  5. In the “Connect Integrations” side panel, click on the DataDog logo, and provide the information obtained from DataDog - API Key, Application Key, Organization.
  6. Once all the fields are properly filled, click on “Connect Integration”.
  7. In few seconds a “Connected successfully” message will appear.
  8. Click on the Done button to complete the process.
  9. DataDog is now successfully connected to the Cypago platform and all relevant monitoring data will be automatically collected and analyzed.
How to disconnect DataDog from Cypago In Cypago:
  1. In your Cypago account, go to the Integrations page, and scroll down to the DataDog integration section.
  2. From here there are two options for disconnecting: (i) disable the entire connection with DataDog, or (ii) disable a specific account in case you’ve connected more than one to the Cypago platform.
  3. In order to disable the entire connection, click on the Enabled switch to toggle the Disabled mode.
  4. If you want to disable only a specific account, click on the down arrow to open the detail view, and click on the Enabled switch near the account you would like to disable.
In DataDog:
  1. In DataDog’s main screen, hover over your avatar in the lower left-hand corner and choose the “Organization Settings” option.
  2. Delete the API Key created for the Cypago integration from the “API Keys” section.
  3. Delete the Application Key created for the Cypago integration from the “Application Keys” section.
Duo
Duo
Elastic
Elastic
Freshservice
Freshservice
GitHub
GitHub
Gitlab
Gitlab
Google
Google
Google Cloud Platform
Google Drive
Google Drive
Grafana
Grafana
HashiCorp Vault
HashiCorp Vault
Hibob
Hibob
InTune
InTune
Jamf
Jamf
Jenkins
Jenkins
Jfrog
Jfrog
Jira
Jira
Jumpcloud
Jumpcloud
KnowBe4
KnowBe4
Linear
Linear
Microsoft 365
Microsoft 365
Microsoft AD
Microsoft AD
Microsoft Defender
Microsoft Defender
Microsoft SQL Server
Microsoft Teams
Microsoft Teams
Monday.com
Monday.com
MongoDB
MongoDB
MySQL
MySQL
New Relic
New Relic
Notion
Notion
Okta
Okta
Onelogin
Onelogin
Opsgenie
Opsgenie
Pagerduty
Pagerduty

Cypago + PagerDuty Integration

Leverage PagerDuty’s alerts and dashboards to enhance your security compliance automation with the Cypago Compliance Automation platform. Below are the step-by-step instructions on how to connect PagerDuty to Cypago and manage this integration.

How it works

Cypago automatically collects alert events, configurations, policies, and multiple other data types from PagerDuty. This collective data is then analyzed against the security and monitoring requirements made by the security frameworks adopted by the user. The analysis result is a gap/compliant status, indicating whether the collected data satisfies the security compliance requirements. Based on the automated compliance analysis done by the Cypago platform, the user gets an in-depth understanding of its security compliance posture.

Requirements

The PagerDuty integration requires only a “read scope” permission in order to collect the compliance-related evidence data.

Support

If you need any help getting the PagerDuty integration up and running, please do not hesitate to reach out to us via email at
support@cypago.com.

Integration walkthrough

Connecting PagerDuty to Cypago

It is very easy and straightforward to integrate PagerDuty into the Cypago platform.
  1. Login to your Cypago account and go to the Integrations tab.
  2. Click on Connect at the upper right corner to start the integration process.
  3. In the “Select Integrations” side panel, click on the Monitoring group, and then check the box near the PagerDuty logo.
  4. Click Next, and then Next again at the bottom of the “Select Integrations” side panel.
  5. In the “Connect Integration” side panel, click on the PagerDuty logo, and click on the “Connect Integration” button at the bottom of the screen.
  6. A “PagerDuty Sign In” pop-up window will appear where you should provide the email address you use to manage your PagerDuty account (if you are already signed in to your PagerDuty account you can skip this step).
  7. Click Next and then provide your password in the next window and click “Sign In”, or sign in using your Single Sign-On provider.
  8. If you have more than one account associated with the provided set of credentials, choose the main PagerDuty account you will be using to share alerts and other monitoring data.
  9. In the “Request for user consent” window, you can review the specific permissions required, and then click “Submit Consent” to connect to the Cypago app.
  10. After few seconds a Cypago window will appear notifying on the successful integration. You can now click the Close button.
  11. Back to the “Connect Integration” side panel on the Cypago platform, click on the Done button at the bottom of the screen.
  12. PagerDuty is now successfully connected to the Cypago platform using the selected account. All relevant monitoring data will now be automatically collected and analyzed.

How to disconnect PagerDuty from Cypago

In Cypago:
  1. In your Cypago account, go to the Integrations page, and scroll down to the PagerDuty integration section.
  2. At this point there are two options: One is to disable the entire connection with PagerDuty, or to disable a specific account in case you’ve connected more than one to the Cypago platform.
  3. In order to disable the entire connection, click on the Enabled switch to toggle the Disabled mode.
  4. If you want to disable only a specific account, click on the down arrow to open the detail view, and click on the Enabled switch near the account you would like to disable.
In PagerDuty:
  1. Login to PagerDuty using the same account you were using to connect PagerDuty to Cypago.
  2. Click on your Avatar icon at the top right corner and then click on “My Profile”.
  3. In the profile screen, click on the “User Settings” tab, identify the Cypago application in the Applications table, and then click on Revoke to remove the Cypago app from your account.
If you have any questions or comments, please feel free to contact us.
PostgreSQL
PostgreSQL
Prisma Access GlobalProtect
Rapid7
Rapid7
Salesforce
Salesforce
SAP SuccessFactors
SAP SuccessFactors
Secret Server
Secret Server
ServiceNow
ServiceNow
Slack
Slack
Snowflake
Snowflake
Snyk
Snyk
Splunk
Splunk
Sumo Logic
Sumo Logic
TeamCity
TeamCity
Tenable
Tenable
Terraform
Terraform
Tines
Tines
Trend Micro
Trend Micro
VMware vSphere
VMware vSphere
Workday
Workday
Workspace ONE
Workspace ONE
Zendesk
Zendesk
See More
visual

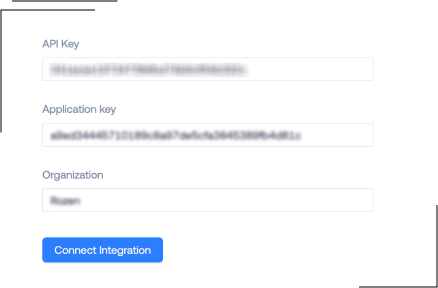
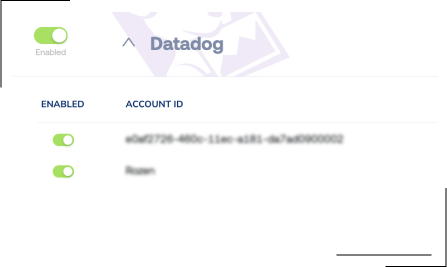
Cypago’s revolutionary SaaS-based Cyber GRC Automation (CGA) platform redefines the three-line model by eliminating friction and bridging the gap between management, security, and operations. It transforms GRC initiatives into automated processes, enabling in-depth visibility, streamlining enforcement, and significantly reducing overall costs. The platform leverages innovative technologies, including advanced Correlation Engines, GenAI and NLP models, which are designed to support any security framework in any IT environment, both in the cloud and on-premises.